


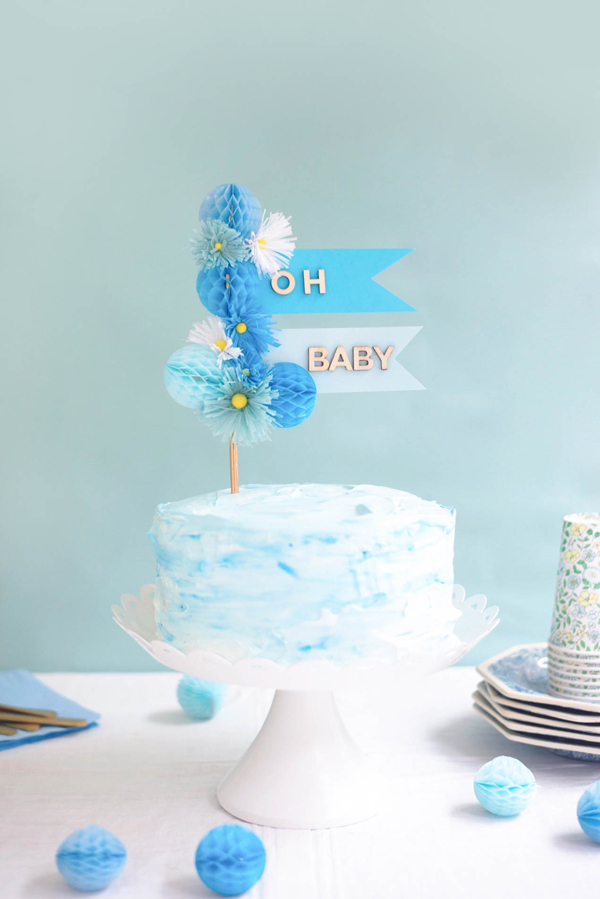
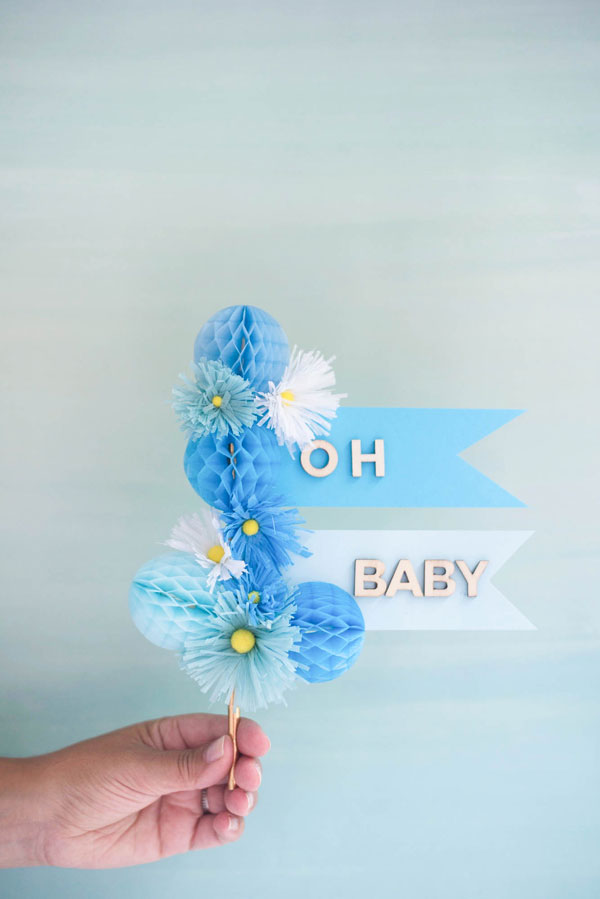
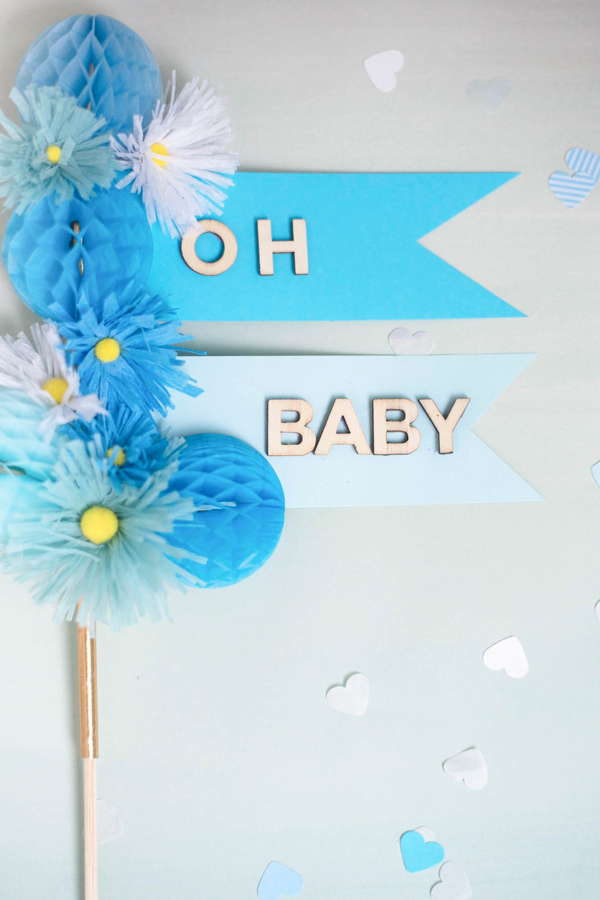
What is more exciting than a baby on its way?!? Celebrate the love for a new arrival by creating a handmade cake topper. Flowers and honeycombs can be made out of any color combo you wish! A raspberry, blush and bubblegum pink combination would be so sweet for a baby girl. Don’t know the gender yet? An all-white version would be darling!
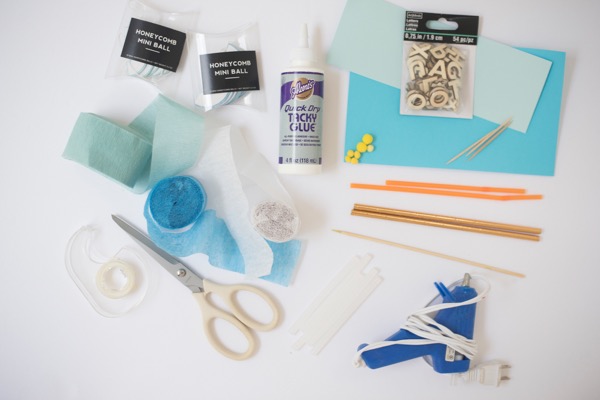
Materials needed: card stock, scissors, wooden alphabet letters, craft glue, crepe paper streamers, yellow pom poms, a plastic straw, honeycomb balls, hot glue gun, bamboo skewer, 2 gold paper straws, toothpicks.
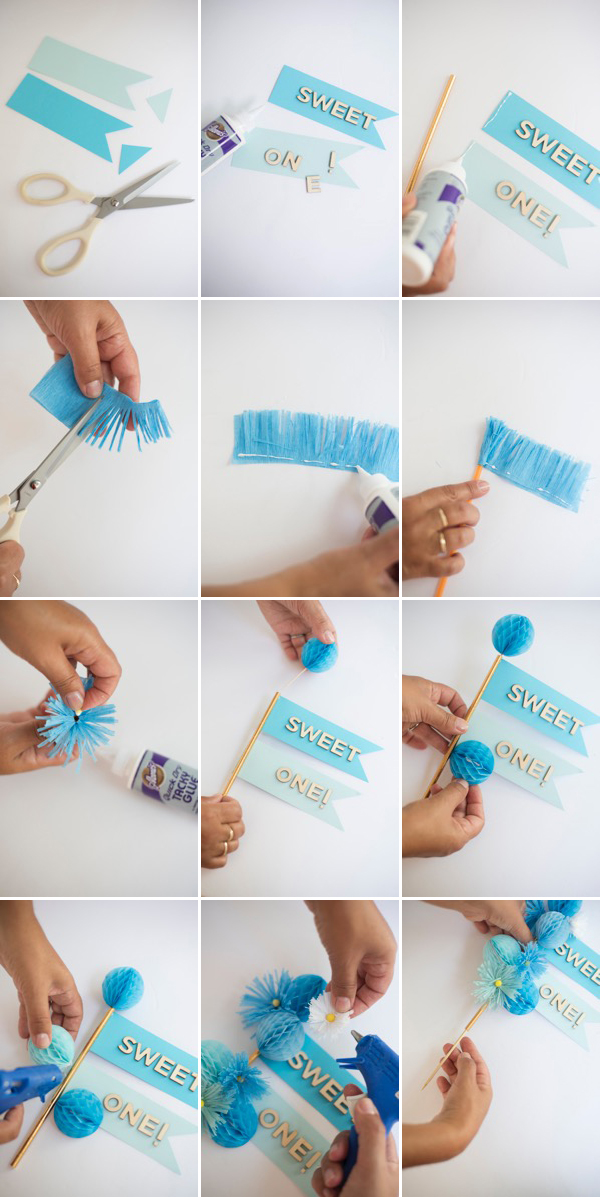
Step 1: From two shades of blue cardstock (or whatever color version you choose), cut out 2 ½” x 6 inch rectangles. Notch the right side with scissors.
Step 2: Using craft glue, attach your phrase using the wooden letters. Leave enough room on the bottom flag to attach a honeycomb ball to the lower left side later on. Let dry.
Step 3: Glue the paper flags to the back of a gold straw. Lay flat to dry.
Step 4: Take a 12” piece of crepe paper streamer, fold in half, and fold again in half. Cut fringe into the side of the streamer.
Step 5: Open the streamer, then fold in half again (this separates the paper so the fringe doesn’t stick together). Lay flat, and apply a line of glue along the non-fringed edge.
Step 6: Roll a straw along the glue, squeezing with your fingers as you go. After all the crepe paper is rolled up, gently open the flower with your finger.
Step 7: Glue a small yellow pom pom in the center of the petals, and cut the straw off the flower, very close to the bottom of the crepe paper. Repeat 6 times. For different size flowers, cut up to ½” off the fringed edge off after you roll it up along the straw.
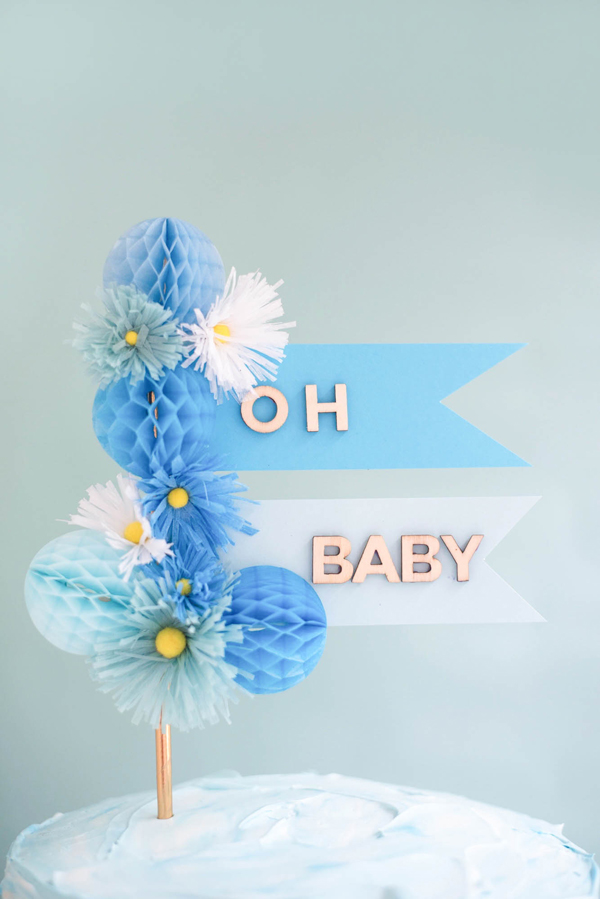
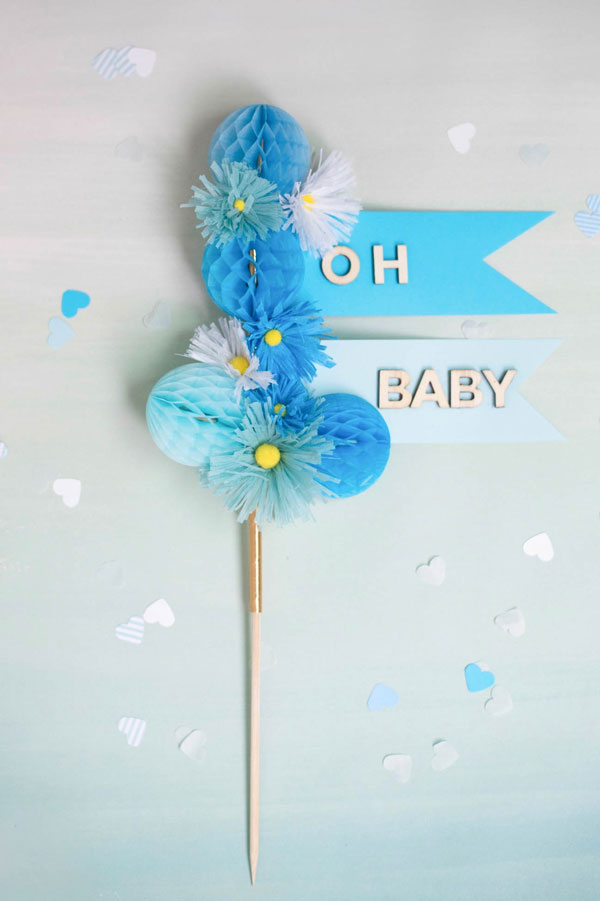
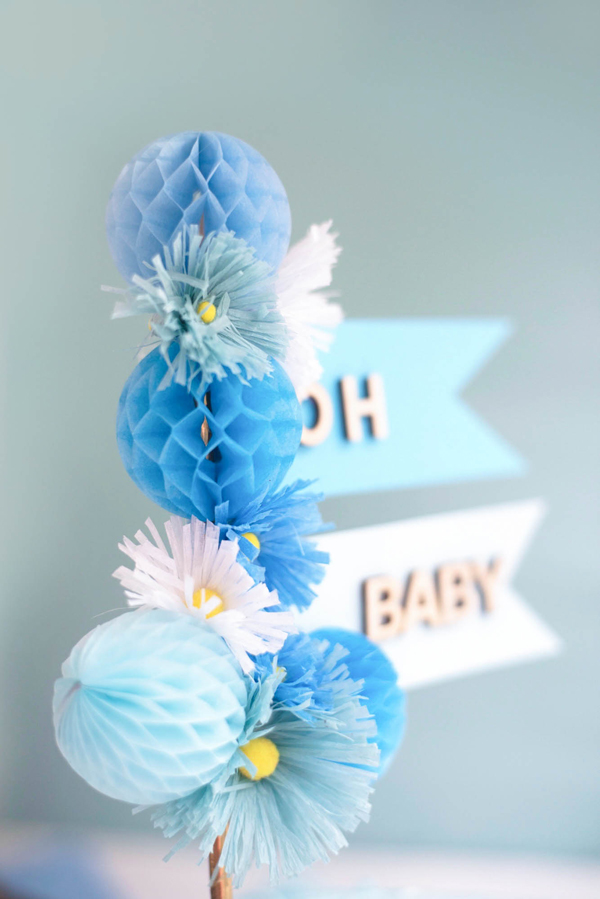
Step 8: Open one blue honeycomb ball, cut off the hanging string, and insert a toothpick into the bottom. With a dab of glue, insert into the toothpick into the gold straw.
Step 9: Open another honeycomb ball, and using doublestick tape, attach to the lower left corner of the bottom flag.
Step 10: Using hot glue, attach two more honeycomb balls to the left side of the flags and straw.
Step 11: With hot glue, attach the blue and white flowers in between honeycomb balls.
Step 12: Remove any strands of hot glue once they are cool. Fluff and adjust any flowers as needed. Insert a wooden skewer into the cake, then place the gold straw over the standing skewer.
Photography by Tim Gibson


Michelle
September 14, 2017
It’s so cute with those little flowers!
https://www.makeandmess.com/
Kate
September 14, 2017
This is so cute! I’m so going to keep this in mind for the next baby shower I plan. I love how precious but modern it looks! Great idea!
K A T E L A T E L Y || fashion + lifestyle
http://www.katelately.co
Belle
September 14, 2017
This would be so cute for a baby shower… or even a white and gold version for a bridal shower!
http://www.thislifeisbelle.com
Scott Spencer-White
September 22, 2017
Brilliant idea! – Thank you! Trip to hobby craft required! 🙂
Emm
September 25, 2017
Lovely! This topper is soo sweet and I think it’s not so hard to make it.