


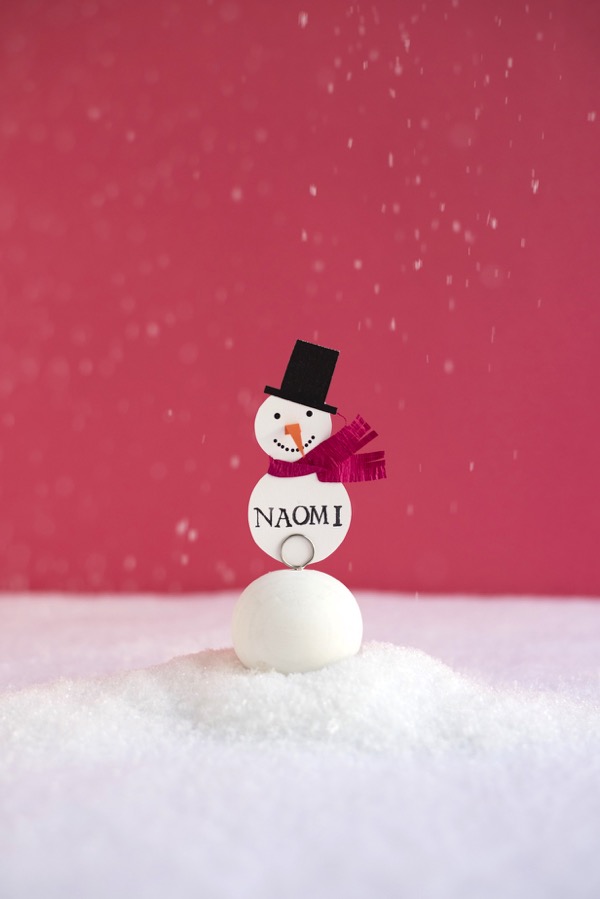
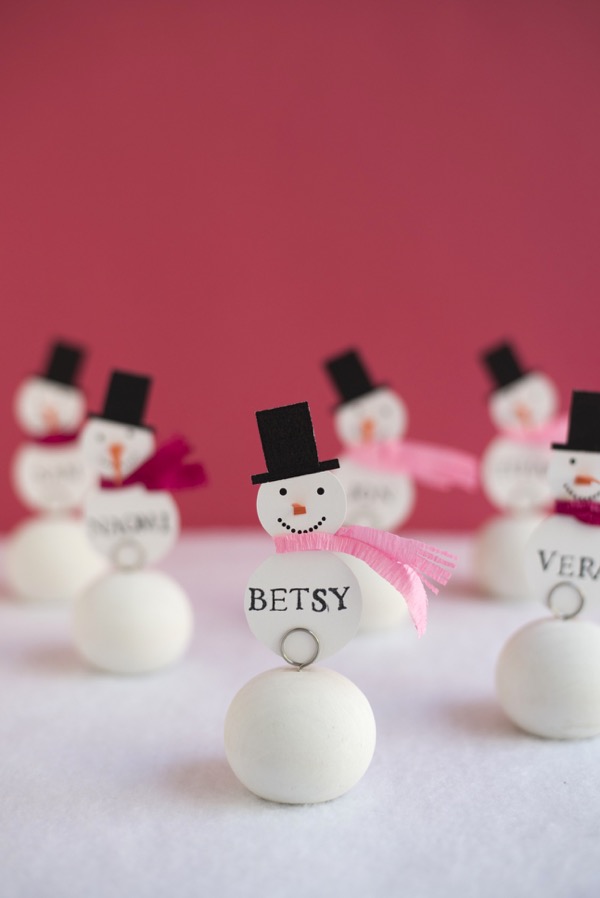
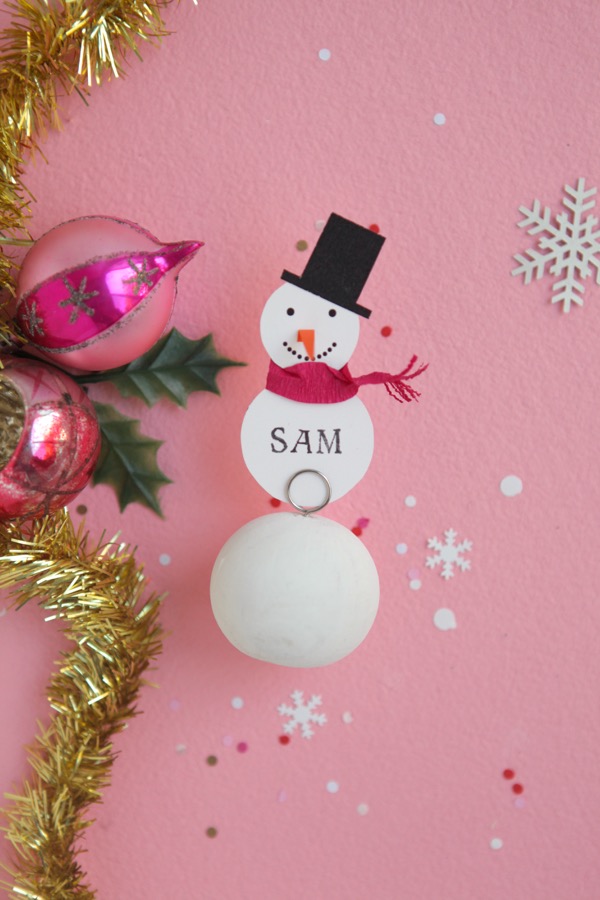
This year, enlist some snowmen to direct your guests to their spots at your holiday table. These guys, with their eyes made out of coal, and jaunty stovepipe hats, will charm everyone as they sit down. Use a scrap of cloth, tissue paper, or even piece of a printed napkin for the scarf, if you don’t have any bits of crepe paper. Best news – they won’t melt! Happy Holidays!
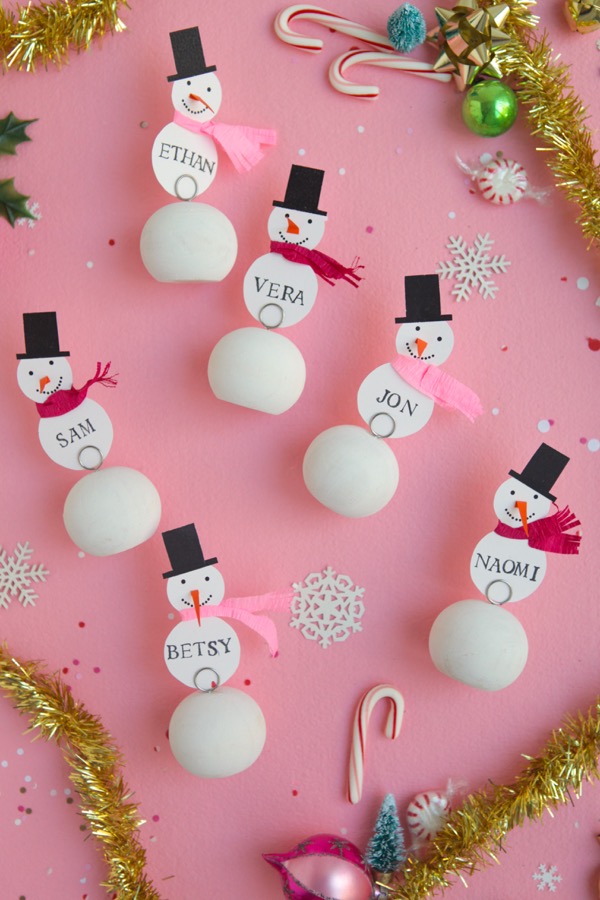


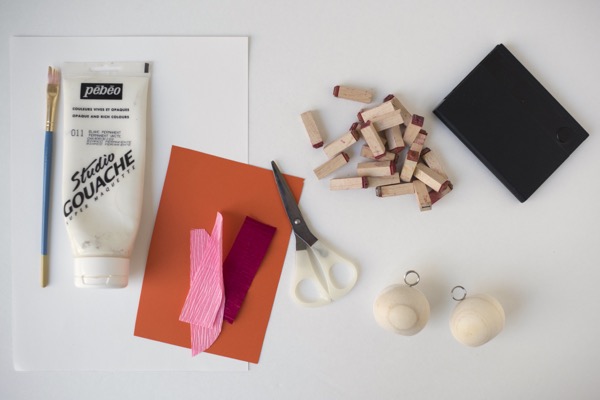
Materials needed: Wooden place card stands, scissors, snowman template, craft glue, white paint, paintbrush, scraps of crepe paper, orange cardstock, alphabet stamps, ink pad.
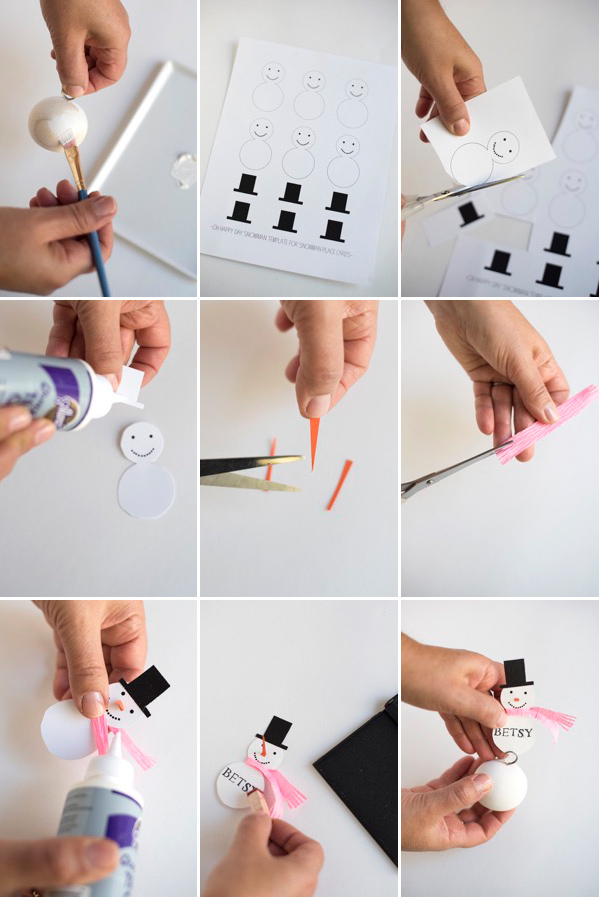
Step 1: Paint the wooden place card stands white. Let dry.
Step 2: Print out the snowman template. Cut out snowmen and hats, cutting just inside the black line on the snowmen.
Step 3: With a dab of glue, attach the hats to the head of the snowman. Adjust the angle on different snowmen for variety.
Step 4: Cut a ¾” x ¼” strip of orange cardstock. Cut lengthwise into a triangle to make the snowman’s nose.
Step 5: Dab a tiny bit of glue onto the wide end of the nose. Stick it on the face pointing up. Let dry, then fold the nose down to stick straight out.
Step 6: Cut out a 3” x ½” piece of crepe paper. Fringe both short ends.
Step 7: Wrap the scarf around the neck and secure with a dot of glue.
Step 8: Stamp your guests names on the belly of the snowman (you could also simply write names in pen or marker if you wish).
Step 9: Slide the snowman into the base of the wooden place card stand.

Photography by Tim Gibson


Natalie Harney
December 5, 2016
These are so so lovely, their scarves are so cute
– Natalie
http://www.workovereasy.com
Tori//Gringalicious.com
December 5, 2016
Super CAH-UTE! I’ve gotta try making these!
Jessica
December 5, 2016
So so lovely x
Jessica — NinetyCo
Kari
December 5, 2016
Those are just too cute!
Kari
http://sweetteasweetie.com/10-minute-pretzel-chocolate-chip-cookies/
Michelle
December 6, 2016
That’s a super cute idea!
https://www.makeandmess.com/
Misty
December 6, 2016
These are so cute!
noovihandayani
December 13, 2016
ohmy! this DIY post is really inspiring! i’ll try it my self 😀 😀 😀
https://www.noovihandayani.com/