


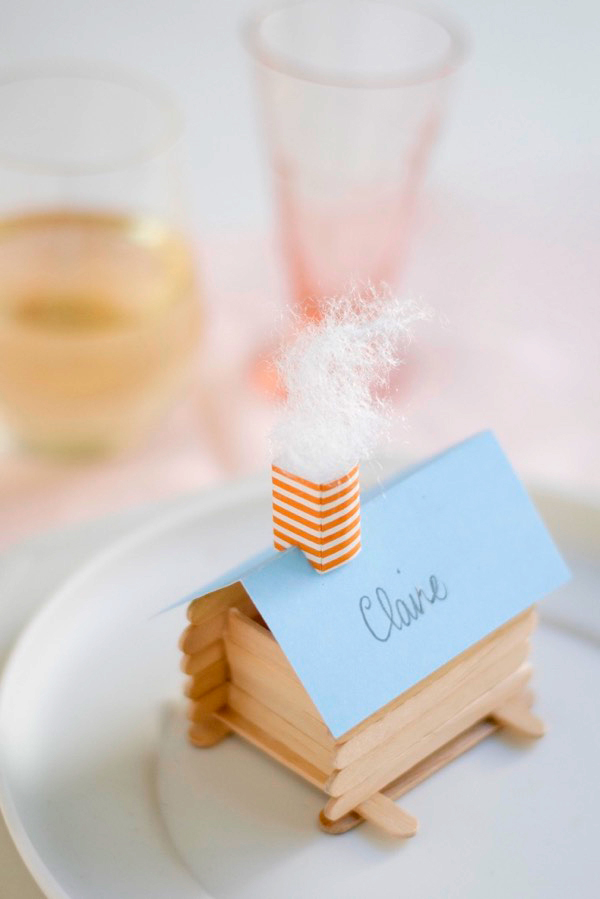
There’s something charming about Popsicle stick crafts – even more so when you use miniature Popsicle sticks! The roof of these log cabin-inspired structures is the perfect size for a place card. They would also be cute for decorating a shelf or a mantel. The smoke coming out the chimney adds the perfect touch of whimsy.


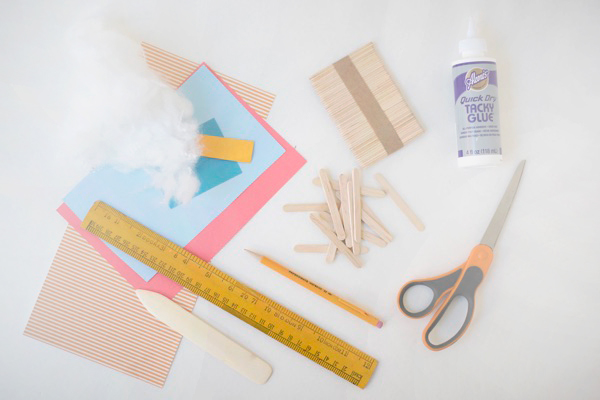
Materials needed: mini Popsicle sticks, paper, craft glue, scissors, bone folder, ruler, pencil, stuffing or cotton balls.
Step 1: Take two mini Popsicle sticks and place them 2 inches apart. Glue two more sticks across the first two, about ½” from each end.
Step 2: With a pencil, mark the midpoint of each intersection of sticks. This will be the length of your side walls.
Step 3: Cut one stick to fit inside the pencil marks.
Step 4: Using the short, cut stick as a guide, cut the ends off eight sticks.
Step 5: Apply a line of glue to the longer sides, and attach two sticks along their skinny side.
Step 6: Insert and glue two smaller ‘side’ sticks, along their skinny side.
Step 7: Continue until you have 4 short sides stacked up, and 5 long sides stacked up. Let dry.
Step 8: Cut a 3” x 4” piece of cardstock. Fold in half and crease firmly with the bone folder.
Step 9: Write your guests name across one side. Gently glue to top of cabin.
Step 10: Take a ¾” x 2 ½” strip of paper and crease it with a bone folder every ½.” You should have 5 segments.
Step 11: Fold the strip of paper into a chimney shape and secure with glue. Let dry.
Step 12: Cut a tiny triangle into one side of the bottom of the chimney.
Step 13: Cut a tiny matching triangle into the opposite side of the bottom of the chimney.
Step 14: Place a line of glue along the bottom edge of the chimney and attach to roof.
Step 15: Using a pencil to poke it in, add a small bit of stuffing or ripped cotton ball coming out of the chimney.


Photography by Tim Gibson


Rachel Ang
November 9, 2015
CUTE!!!
RACHEL X
THEHAPPYBITS.BLOGSPOT.COM
Paige
November 9, 2015
These holders are so cute! You did a great job!
Paige
http://thehappyflammily.com
Amy | Delineate Your Dwelling
November 9, 2015
This is crazy adorable!
Michelle
November 10, 2015
How adorable is that? This is such a great idea!
https://www.makeandmess.com/
Monique | WritingMonique
November 10, 2015
Oh my! This is absolutely awesome! Love these!
Rae
November 10, 2015
This is such a darling DIY and would also be a perfect project to do with kids. Thanks for sharing it!
Rae of Love from Berlin