


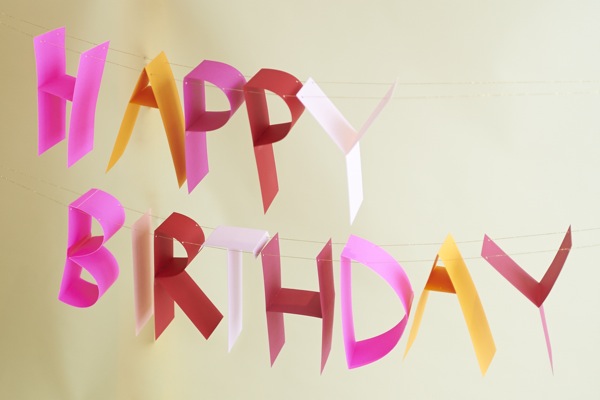
A long time ago, I pinned this beautiful cake I’d come across by Sarah at Signe Sugar. I loved it so much, it inspired me to create this paper banner version. I had no idea how to go about it, so I just jumped into cutting, bending and gluing. Once I got the hang of it, it came together pretty quickly. And, if you mess up, it’s just paper – – so just cut another piece and keep moving forward!


Materials needed: card stock or heavyweight paper, ruler, x-acto knife, bone folder
, scissors, glue
, string
, mini hole punch
.
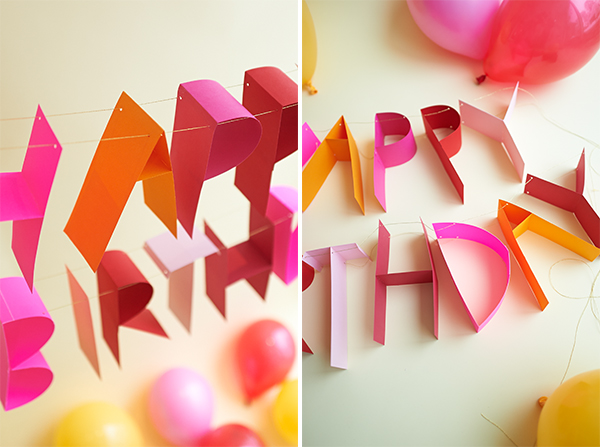
Step 1: Begin by cutting several strips of 8″ x 3″ paper. To create tall, narrow letters, keep the inside pieces small. For example, for the “H,” begin with two 8″ x 3″ strips, and cut a 2″ x 3″ piece for the inside center piece.
Step 2: Draw a line of glue on the 3″ side of the small center piece.
Step 3: Attach it at a 90 degree angle to one 8″ x 3″ piece, about 2″ down from the top. Hold for a few seconds until the glue sets.
Step 4: Draw a thin line of glue on the top of the 3″ center piece, and gently attach another 8″ x 3″ strip, matching the first 8″ x 3″ strip. Continue in this way for the H, A, Y, I, T, H, A, and Y.
Step 5: For letters that have curves, begin with your 8″ x 3″ strip. For the “P,” take a second strip approx. 7″ x 3″ and, with your bone folder, gently score a crease 1/2″ from the top. Fold gently 90 degrees. Flip this strip over and score 1/2″ down from the other end.
Step 6: Apply glue to the top of the creased strip.
Step 7: Glue the creased strip to the outside top of the flat 8″ x 3″ strip.
Step 8: Apply glue to the inside of the second creased 1/2″ fold. Gently bend the “P” shape and attach to the 8″ x 3″ strip about 3 1/2″ inches from the top of the letter. Press and hold for a few seconds. Continue in this way with the B, R, and D.
Step 9: Punch holes 1/2″ down from the FRONT top of each letter, on both left and right sides of the letter.
Step 10: Punch holes 1/2″ down from the BACK top of each letter, on both left and right sides of the letter.
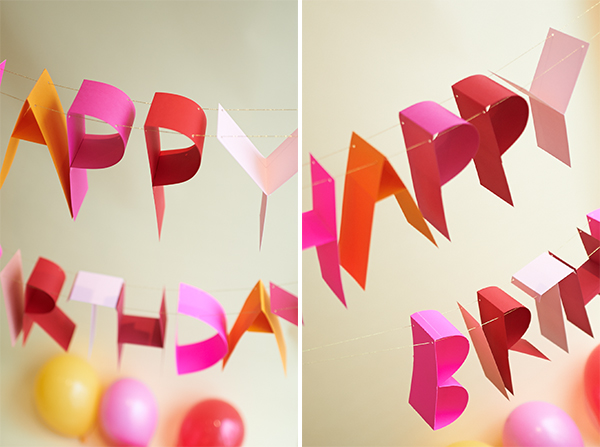
Step 11: Line up your letters and thread string through each FRONT top hole of every letter.
Step 12: Thread string through each BACK top hole of every letter.
Step 13: Carefully hang the banner, adjusting the letters and the string to get the right tension and placement of the letters. Enjoy!


Photography by Tim Gibson


Birdy& Bambi
February 25, 2014
That’s so pretty! And so crafty!
Thanks for sharing and greetings from Germany,
Birdy and Bambi
http://lasagnolove.blogspot.de/
Hillory
February 25, 2014
Just wanted to say that I love your website (also, your 3D birthday banner was adorable Chiara), but I was SO distracted by the heinous “League of Angels” ad playing over and over…just sayin’.
Leith
February 25, 2014
Your endless creative inspiration never ceases to amaze me. Your kids are so lucky with all these fun parties they get to take part in! – Leith
http://www.thesanfranciscan.co/
Thanks so much! This idea came from one of our awesome contributors, Chiara. She’s amazing!
Giovanna
February 25, 2014
Oh oh oh… Oh happy day! Amazing!
Nat
February 25, 2014
sooooo great ! love it, i will do my version in spanish !!!
Laura
February 25, 2014
So creative!
A Styled Life Blog
alice
February 25, 2014
i adore this! a definite must for the next bday party in our house.
Paulette Leto
February 25, 2014
I really love the 3-D effect of this banner! Plus I just found a stack of old construction paper this afternoon while I was going through some drawers, so I could definitely do this soon. Thanks for the idea!
Srta.Perez
February 25, 2014
Beautiful, I keep the idea for my birthday party. There are still months and am organizing but that 30 does not meet every day!!
Iquo
February 26, 2014
This is so cute! I love it! How creative!
Iquo
keaishop.com
iquoismusic.com
Marix
February 26, 2014
This is very cool! love the 3d effect!
Gwen
February 26, 2014
That is simply the cutest birthday banner ever!
meg
February 26, 2014
These are fun! So clever. I will have to try it out next time I have a bday party 🙂
manuela
February 26, 2014
Love this birthday banner. I published a birthday calendar in a cake shape. Each piece of the cake has a surprise and represents each day of the month, from the beginning to the birthday.. You can see it in this link http://bit.ly/1c8C4E3
Aunt Peaches
February 27, 2014
This is 100 kinds of rad. Dang.
Sidenote: I saw a similar cake topper as the one linked but the lettering was made out of strips of gum (SO EASY)… wasn’t that a clever idea? Not nearly as clever as this. Gorgeous! I don’t know how I’ll implement this but I’ll tell you one thing — it’s staying up much longer than just a birthday party. Thank you!
Elaine
March 6, 2014
Oh wow! I can see this setting the fun mood for any birthday party, will share this with my friend who has 2 daughters with birthdays coming up soon!
lyndsay // coco cake land
March 6, 2014
chiara! WOH you are on FIRE lady!! love how you were inspired by signe sugar. xo