


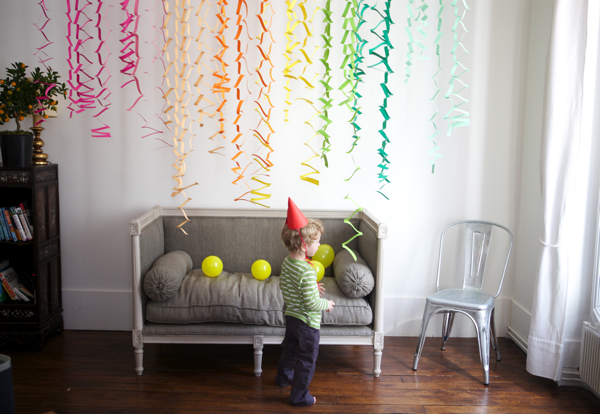
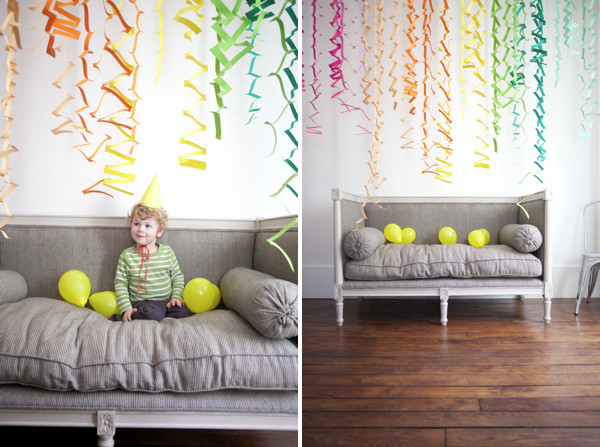
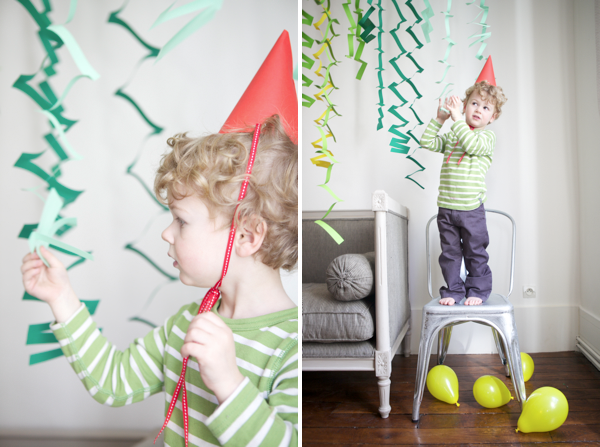
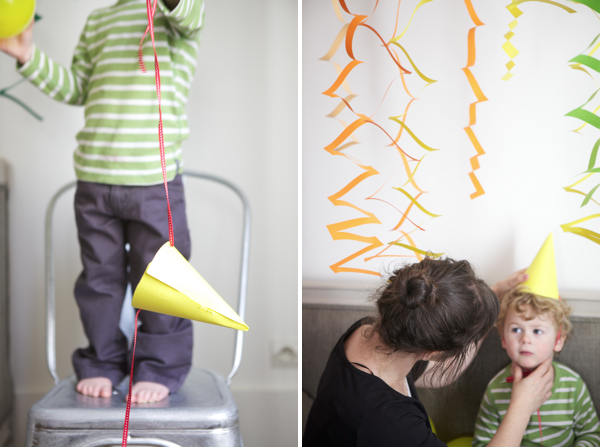
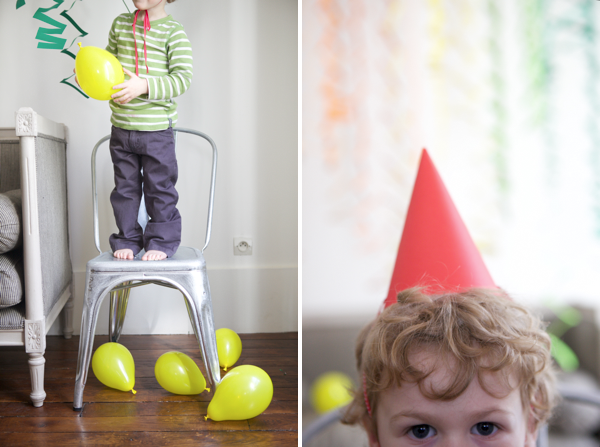
I made these cool zigzag streamers for Paul’s birthday last week but I forgot to take photos so I made Moses put on a hat and pose during Roman’s nap time today. My mom taught me how to make these and they are about the easiest party decor there is. All you need is colored paper and pair of scissors. Really, its that easy. Instructions Below. Ps: If you are looking for the party hat template go here.

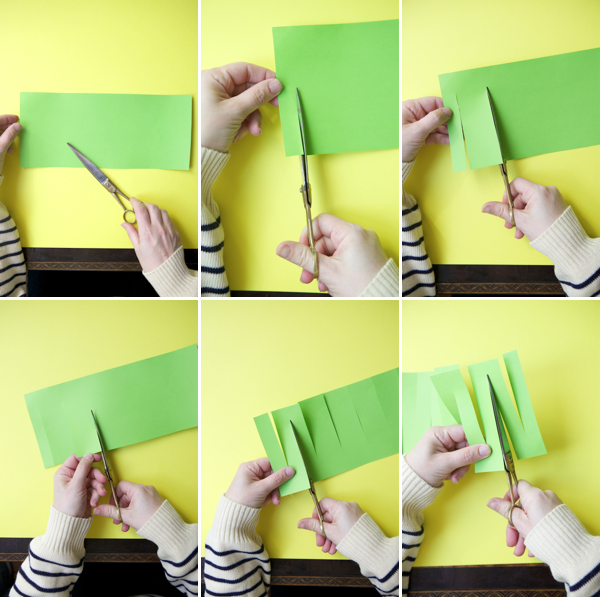
Step 1: Start with some colored paper in the shape of a rectangle. Start on one of the long sides and cut a strip about 1″ wide but don’t cut all the way through.
Step 2: From there measure about 2″ from the first and cut again. Continue doing 2″ cuts on that side of the paper.
Step 3: Turn the paper over and make cuts (but not all the way through) half way between the 2″ sections. Et voilà! You have an accordion streamer to make you party festive.
I love these streamers because they don’t have to be perfect, my cuts are crooked and uneven but they still turned out great.


photos by Paul Ferney for Oh Happy Day


Timmi
March 23, 2011
Oh I love this! I am doing a colorful rainbow party for my upcoming 5 year old's party. Your site has been giving me so many wonderful ideas since you love color yourself! Thanks a bunch!
Ashley
March 23, 2011
This is a gorgeous idea, made even more lovely with your fantastic photographs, Jordan. A bit off topic, but is that loveseat in your home? It's gorgeous!!
Lauren
March 23, 2011
These are so cool, can't wait to try them!
Alice C
March 23, 2011
love.love.love. thank you for sharing this with us!
Kathleen
March 23, 2011
Great project, easy too! Love it.
Paul & Paula
March 23, 2011
aha aha aha… you are so great 🙂
I have my sons first bday on Friday and will make those, easy and pretty!!!
Thank you!
angie
March 23, 2011
i love your diy here! so cute and festive. i also really love that grey seat!
Kate {domestikatedlife}
March 23, 2011
Love the streamers, and love love love that little settee!
lizzie
March 23, 2011
TOO cute. so simple. would be beautiful for weddings too!
Jan | Poppytalk
March 23, 2011
so so clever!
kathy besser
March 23, 2011
Thank you so much for the instructions!! I'm hosting a bridal shower in less than two weeks and this will be so cute over the gift table! kathy
Becs
March 23, 2011
Beautiful! Love those colours… and your furniture.
r8chel
March 23, 2011
These are so great! It adds so much texture and dimension. I'm definitely bookmarking this for future reference.
Jan @ Family Bites
March 23, 2011
Oh my gosh…we used to something like this in elementary school. Thanks for the reminder and tutorial. You really need to write a book….
joksie
March 23, 2011
this is reallly great and so simple, i will be using this weekend at a papercraft party. thanks for putting this up absolutely love it!
Janssen
March 23, 2011
Those are darling!
And i love the new seating.
Amy
March 23, 2011
neat idea, i'm going to try these for my daughter's party in a couple of weeks
Abbigail
March 23, 2011
Nice work. Turned out great. Moses looks so sweet in your new setee. I am going to teach my five year old daughter how to make these. She loves cutting paper.
Paige Rien
March 23, 2011
how geniously easy, happy, cheap and beautiful. wondering if they could work with a more permanent material….it's like a contemporary art installation! adult mobile! raining paper rainbows!
Abbigail
March 23, 2011
pardon me, settee.
logan
March 23, 2011
Love these! My baby's party is coming up…so I might have to do use this great idea!
Sarah
March 23, 2011
I love these! It totally goes with all the rainbow stuff that's been floating around the blog community lately. Thanks for sharing =)
– Sarah
http://agirlintransit.blogspot.com/
silly eagle books
March 23, 2011
These are beautiful–I love how easy they are–that is key for me. 🙂
Robyn
March 23, 2011
love this idea so much! i think we may hang some of these above our little bird's crib, once we know if it's a he bird or a she bird!
Kathy
March 23, 2011
Love these!
Margot Madison Creative
March 23, 2011
I know everyone is saying this, but it's no less true. LOVE IT!
Miss B.
March 23, 2011
your little one seems so patient!
Em
March 23, 2011
doesn't everything look better as a rainbow? Lovely, had to pin this.
Kathleen Frances
March 23, 2011
These are so great! Would make an easy deco for rainbow party.
Erika
March 23, 2011
Ooooh – I'm using this for Cinco de Mayo so cute! Thanks!
whitneyingram
March 23, 2011
I just used your idea for fringe steamers you posted a few weeks ago and it worked so good! Thanks for the simple (and sort of "duh") ideas!
michelle
March 23, 2011
Cute streamers but I'm loving your hair in a messy bun!
janis
March 23, 2011
i love that kid. seriously, so cute. also, couch/loveseat = AMAZZZZING!
Dee
March 23, 2011
I remember doing this as a kid! So cute and easy to do. I just whipped up a bunch for my son's 6 birthday tomorrow!
MissK
March 23, 2011
Looks great
anyone know how you attach the top of them to the ceiling,espaecially when renting?
jordan
March 23, 2011
@MissK: Just a little piece of scotch tape. It comes of easy.
Make.Good
March 23, 2011
Perfection! When it's that easy, it's bound to be beautiful.
Michelle
March 23, 2011
Love the streamers! Great idea!!!
Lauren
March 23, 2011
Your new settee is lovely!
I love post-event reinactment photos- I feel like I am always forgetting to take pictures at the right time!
Anonymous
March 23, 2011
This might seem like a lame question but here goes, how do you attach it to the ceiling?
jordan
March 23, 2011
@anon Not a Lame Question. I just used scotch tape. Came right off.
Jordan - Polkadot Prints
March 23, 2011
I remember these from school days – love that handmade is so back in style. I get a second chance to get my childhood craft on…(and do it a little more stylishly!) 🙂 Thanks for the great DIY's
Oh, and love your new sofa!
Itsy Bitsy Art
March 23, 2011
This is so clever! LOVE it!!
Lexi
March 23, 2011
So simple and cute!
xox Lexi
Glitter & Pearls
hyderabad
March 24, 2011
The Content/ remarks were helpful. From http://www.hyderabadonnet.com
La Ballena Elena
March 24, 2011
You're a garland genious
maria
March 24, 2011
what a great and easy idea!!
just made a quick one to get the hang of it and
plan to make lots and lots with colored paper!
You inspire me so much with all your wonderful posts.
I always check in!
thanks a million!
Leslie
March 24, 2011
Freaking awesome!
rebecca
March 24, 2011
AH! Definitely need to make these!!!
mamajoules
March 24, 2011
This is so simple and ingenious . . . I'm going to have to make some for my Will+Kate Royal Wedding watching party next month.